Bonsai is the art of distilling the magic of an ancient tree into a miniature form that is pleasing to the eye. Nature gives us limitless variety where no trees are alike.
In order to create truly interesting bonsai we need to free our imagination and encompass the infinite wonder of the world around us.
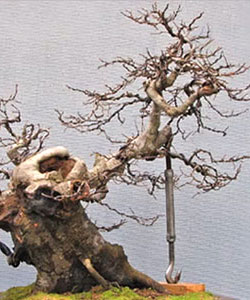
In this post, you will learn how to style a tree through branch trimming, wood carving, and wiring. This Oriental Hornbeam, scientific name Carpinus orientalis, is a well-established tree that has been in development for 7 years with 5 years growing in the same pot.
You can see there is more than one problem that needs to be addressed. This tree has a lot of thick branches growing in different directions and a lot of dense twigging. Just by looking at it, it’s not clear where the front of the tree should be.
We’ll start by deciding on the front of the tree, then remove unwanted branches, clean up the bark, create a hollow by carving the wood, seal the cuts, stain the wood, and finally wire the branches.
Tools you will need:
- Shears – Regular shears that will be used to trim small branches.
- Concave Branch Cutter – Use it to cut branches.
- Bonsai Wire Cutters – You will need to cut wire with these.
- Makita Carving Tool
– I use Makita which is perfect for working on bonsai. Operation is super smooth and ergonomics are very comfortable.
- Diamond Tip Carving Burr
– This 120-piece set offers 30 profiles in four grits, 150, 240, 400, and 600, so you can progress from rapid cutting to final finishing cuts with the same profile.
- Brown Anodized Aluminum Wire – It will be used for wiring branches. I like to use this type of wire because it has an anodized coating which protects the wire from corrosion. It is also easier to apply than copper and blends in with the bark very well.
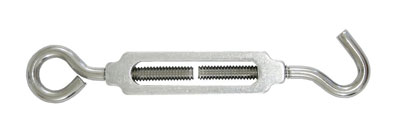
- Turnbuckle
– This stainless steel turnbuckle is great for bending large branches and trunks. Secure each end with a wire and cushioning then simply tighten the turnbuckle to gradually increase force.
- Wood stain
– This is a dark brown wood stain.
- Wound sealant – Seals wounds against insects, disease, and weather. Speeds up the healing process.
Here is a step-by-step video
Step 1: Removing branches
This tree presents a challenge because it has three primary branches that are growing fairly flat in every direction. We do want to remove a branch in the middle because it is coming directly at us. It will open up the trunk.
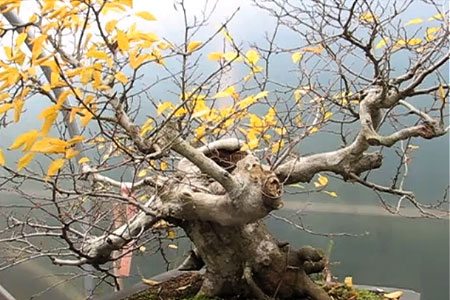
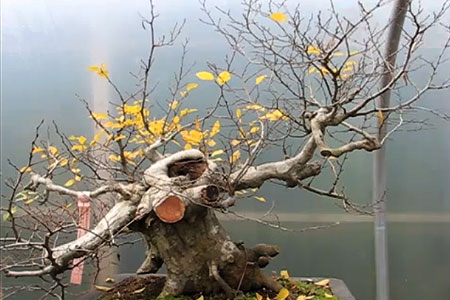
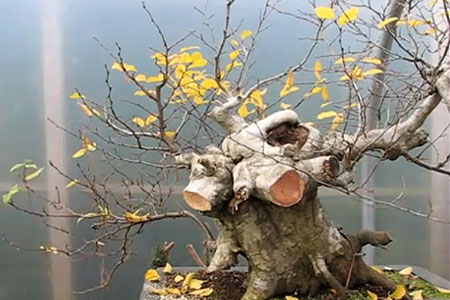
The branch on the right is a keeper. It will give us a good taper because it got a lot of nice side branches. The branch on the left is thick, very straight, and is very ugly at the base where it was cut. Therefore, we are going to trim it.
Step 2: Using turnbuckle
The branch on the right, that we want to keep, is very thick and is almost parallel to the ground. To create a more interesting line, it should be bent upwards. A lot of people wouldn’t try bending a branch that big, but it can be done by using a turnbuckle.
Place a block of wood across the pot and across the soil. Place the turnbuckle on top of the block and underneath the branch.
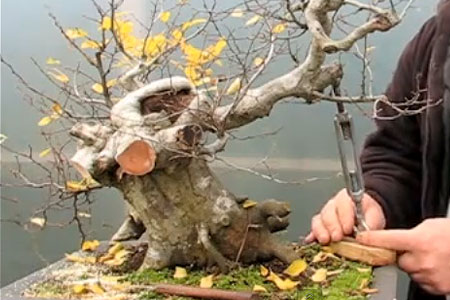
By unscrewing the buckle you can slowly raise the branch. Of course, there is a limit to how much you can bend at once. If you bend too much, it can easily crack. Because this is very healthy, young, and full of sapwood, it will move a lot.
This turnbuckle will stay here for about 1 year, possibly even two years. During that time, this branch will create a lot of new wood underneath the bark and in doing so this position will be fixed. With a turnbuckle, we can give it a turn once in a while to increase the movement.
When bending a thick trunk like this, watch very carefully for small cracks in the bark. If you see any, back it off half a turn and leave it. 3-4 months down the road we can give it another turn and move it a little bit more.
As you can see from the gap in the buckle, this branch has been moved up about 2 inches. It might not seem like much, but it has already improved the flow and the movement of the tree. This is a very simple and stress-free way of bending thick branches.
Step 3: Wood carving
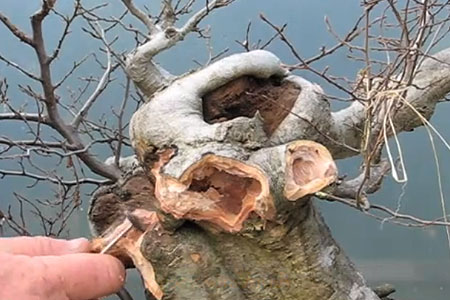
While there is a beautiful callus tissue at the top of the tree, below it you can see ugly scars from two thick branches that we’ve removed. At the bottom and on the sides of the tree, we have some poor roots from when it was pulled out of the ground.
Carving the scars will dramatically improve the taper. Use the Makita electric carving tool to clean up the scars and the bark around them first.

Create a hollow inside both of the cuts.
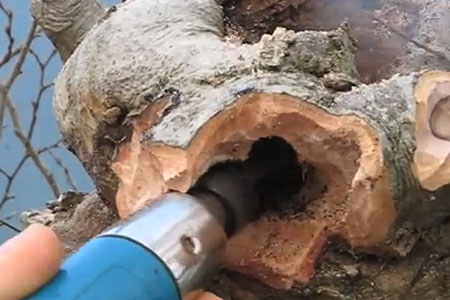
Use finer tools to create some details in the wood. More details can be added over time when the wood is dry. Don’t forget to reduce those ugly roots on the side. It will improve the movement of the tree.
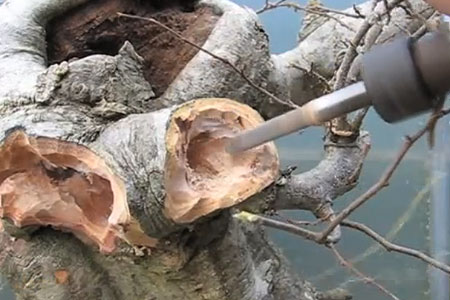
Step 4: Removing fibers
Use a wire brush tool to remove the fuzz and small fibers of the wood.
Step 5: Sealing the cut
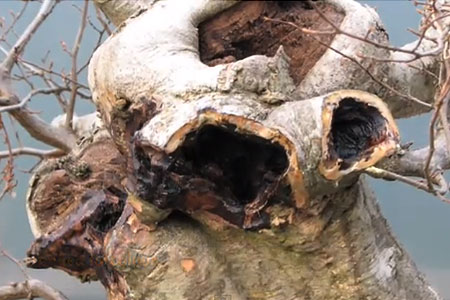
Use wound sealant to seal the edges of the bark. Put a little bit of sealant on the cut and spread it with your fingers.
Step 6: Staining the wood
Apply dark wood stain to the hollow to give it a more natural look. In the beginning, it might look way too dark but it should look much softer the day after.
Step 7: Wiring the tree
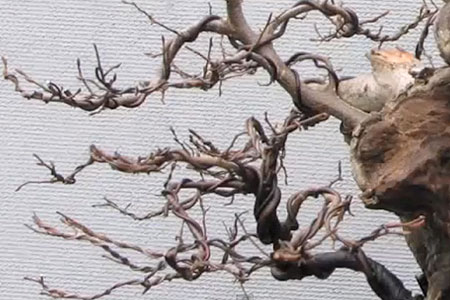
Use rubber tape to protect the bark from wire damage. Soft rubber low tack tape won’t stick to the bark and won’t leave a residue. Use brown anodized aluminum wire to wire the branches.
Trim the access wire with a wire cutter. You want to create a lot of movement while branches are small. Once they thicken, it won’t be so easy.
Final Result
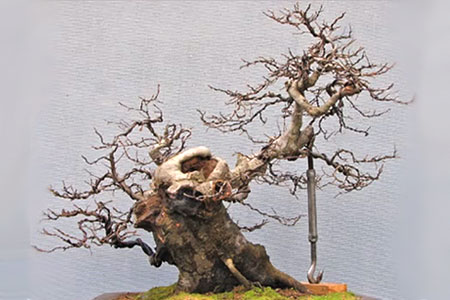
It is hard to believe that what was an ugly stump is now an interesting and inspiring bonsai tree. Of course, it will take some time for the wires and turnbuckle to do their magic, but even now you can clear separation between the main branches, and the hollow that we’ve created looks very natural.
Remember, your goal is to create a bonsai so no one can tell that this tree has been worked on. Since trees are always growing, your work is never done.
Related articles:
